Powered by Blogger.

Salt Lake Temple Picture

Monday, July 8, 2013

Summer Gift Exchange

Once again I have been so stinking busy. With school ending and stress of making sure my students were successful in learning things, getting my classroom packed up and moved, starting Summer School (I am teaching it this summer...and I do not like it), wedding prep for my sister (UGH), and trying to survive the 100+ degree temps we are dealing with (and other things I am dealing with but I'm going there;))...I am about ready to max my credit card and go on a trip and relax! But before I do that I need to show you what I did for the Summer Gift Exchange I did. It is like the one I posted about around Christmas time! I seriously felt like this one had a shorter time period than the other one. I am a little late on gettig the gift to the cute lady I was paired up with, but I got it out today! Sorry Kristin! I'm seriously not a late person, but for some reason this one is late! After e-mailing back and forth via Elfster I started getting ideas. One thing I like about Elfster is that when you register you can start making wishlists with things that they have in a wishlist thing. It helps others get a better idea of your style, likes, etc. I had some ideas floating around and then I went through Kristin's wishlist and saw some pretty cool things. I was starting to get new ideas and then I saw that she had a cute sweater pillow in her wishlist. It was so cute. I thought that should be easy...well not so much! I actually have been learning to sew (my background consists of Jr. High sewing classes...2 of them) but have been having a hard time doing it because my Mom's sewing machine HATES me. I have tried using it in the past and the thing breaks. It seriously will only work for my Mom. I tried helping her do costumes for her school play and it broke on me... twice:(. I seriously think it's possessed! Not even kidding! So for Kristin I made her two pillows! Now, the pillows were actually bought from Ikea (love that maze of a store) and the sweater and ruffle shirt were bought from DI (don't worry, I washed them..really well and they smelled great when I sent them!) I thought they would be great! The sweater is navy blue and the ruffle shirt is gray. I remembered that Kristin mentioned that she decorates with navy blue and I thought the gray went well with it and it has the ruffles...you can't go wrong with ruffles! Now remember, my Mom's sewing machine is biased and only works for her so she did the sewing! I am so grateful for her help! I am the one who sewed the buttons on. It is totally obvious that I am the one that did that part...it's not the best, but I did try and it was by hand! I couldn't think of anything else to put on the sweater pillow. I think it looks good being simple! Especially with the ruffle pillow being so busy! They make a good match if I do say so myself! Here are a few pictures of them post surgery!
And to add to the piece-a-resistaunce (that is total phonetic spelling;)) I had made this little cuttie before the exchange and when I saw that Kristin liked a bird framed mirror with birds similar to this I thought it would be perfect! I was looking for someone special to give it to and she was the perfect one for it! It is bright blue with a bright yellow. It is a happy bird I painted and it has brought happiness to me as it sat waiting for the right person to receive it! I got it from one of my favorite craft places, The Wood Connection. They have some really cute things to paint and put together! I love going in there and being inspired. I have so many projects that I need to complete from there it is taking alot of room up in my bedroom/craft room! Here is the best shot I could get of it. The lighting was not good as I was photographing a huge storm was brewing outside and the lighting was getting all weird!
I love doing these and I have really loved being paired up with Kristin for this Craft Exchange! I would love to have you join up on the next one! You get to meet so many great people and get so many great ideas! Here is the link to webiste to join! Craftaholics Anonymous Happy crafting and if you have any crafting or sewing ideas to share please link up in the comments area. I would love to follow your blog and learn from you!

Saturday, March 2, 2013

I'm here...and I have a question!

I know it's been a long time since I have posted. I have been crazy busy with family, work, and some friends! This year has started off on a very sick note! I work on January 1st with one nasty sore throat, so I went to the doctor the next day and was diagnosed with strep. I was put on anti-biotics. That cleared up and then my glands started swelling...to the point that talking hurt, breathing was difficult, and I was miserable. I mean, I could feel the blasted things, they were getting big and hard. Not a friendly! So I went back to the doctor and was put on a steroid. Don't worry, I didn't start growing a beard or a hairy chest! But it cleared up my glands...only to find out that steriods reduce your bodies defences. I got sick again. My throat started hurting agian, my nose was runny and stuffy at the same time. I was miserable...and to boot my voice was going out. I could barely teach. My voice sounded like I was going through puberty! So after about a month and a half I got better! Things are starting to look up now! I do not want to go through that again! I need to take care of myself, aye! Now I wish spring was here so I could get out and go walking. My goal is to go walking to help me get in shape. I also want to work on my eating habbits...turn them into good eating habbits! So I am posing a question to y'all. What do you do to keep in shape and what do you do to keep eathing healthy? I need some new strategies. I am really struggling and need to make this a good year for me! Happy March and may the Luck of the Irish always be with ye! Okay so my computer is acting up and it won't let me add pictures...so use our imagination and pretentd I posted a dancing leprechaun that had a rainbow over his head! And a sign that says "Happy St. Patrick's Day!"

Saturday, December 1, 2012

Winter Gift Exchange

I began following a WAAAAAAAY cute blog about a year ago called Craftaholics Anonymous Linda is a very sweet and HIGHLY creative lady. She has a great gift/talent for creating some AmAzInG things for her home, kids, husband, and others. I have tried some of her crafts she posts and I love reading about all her cool projects! One thing I have read about since following her blog are the Gift Exchanges she puts together. I am sure it is a HUGE undertaking but, none the less, she does it and it is pretty cool all that is created for it. I thought it would be so fun to try it and so this year I decided to actually do it! I was so scared and intimidated. I kept thinking "What if she (the lady I make the stuff for) doesn't like what I made?", "What if it doesn't match her decore and she chucks it, or decides to give it away because it's not good enough?" I seriously stressed out about it so much I almost backed out. But I am not a giver-upper! I took the time to look up some other crafts to get new ideas, I went to different craft stores around my state, I asked my gift-ee many questions about herself and I did some additonal freaking out along the way! But my great sisters Celeste and Lisa, and my mom all shared alot of faith in my and continually told me I could do it! They were always telling me I do a good job and kept reminding me that I love crafting and have cool ideas....that helped me a lot! My first craft came from a picture of something I saw that my gift-ee posted that she liked....HOLD THE PHONE! I didn't tell ya who I was paired up with. Her name is Julie and she is a sweet heart! I was lucky to be paired up with her. And how cool is this, her daughter's name begins with the same letter that my name does! I know, I'm cheesy! But I think it's cool! So back to my first craft! Julie showed a cute picture of a letter S dressed up and hanging on a door. I decided to do something similar to it but add a few twists and personal touches. Juie said that her favorite colors are Pink (and if I remember right, hot pink was the shade she liked), black, clear, and BLING! I thought, how fun would it be to make and S (in honor of her daughter) and decorate it the colors that she likes. I had read once about a craft that someone did where they took a wooden letter and wrapped string around it. I thought, I should do that...but use ribbon instead! So I bought 4 roles of thin ribbon...instead of wide ribbon! I found some blingy pink gems and some pretty cool shinny pink ribbon! It was NOT at all like I thought it would be! There are so many curves on an S! Ha ha, like me! Here's how it went for making the crafts!
Making the "Love" sign was way fun! I got some ideas from a local company called The Wood Connection. LOVE THAT PLACE! I am working a project I got there, it is going to be really cute! You'll have to check back to see it!
Cute huh?!
Don't worry, I'll show you what this was turned into! I of course had to get my moms help with it. Her sewing machine Hates me...and yes, that is with a capital T! It never works when I use it. Something always goes wrong. I have wanted a sewing machine for myself for so many years so I could try to sew and do fun stuff, but NOOOO! I will have to wait until I get my own place, there is no room here for another one! Ahhh, snap!
This is the S I was talking about! Yes, I used small ribbon on it and LOTS of ModPodge! It was fun, but the top and bottom of the S were really hard to do. It was becoming impossible to get the ribbon on right so it flowed and looked cool. I had to think of something else and I actually think the two different textures I ended up with made it look really cool! I want to try it on another project I have been working on for about 2 years! I ended up wrapping the ribbon on the middle section and then spraying it with clear sealant and then painting the ends with black paint. I then added some embelishments, one of which was the Love sign! It made it so cute. Then to make it hang-able I added some wide bright pink ribbon. It turned out so cute! I want to do another one! Here is what it looks like at the UPS store just before it was packaged to be sent away! Sorry the picture wasn't very good. It was taken with my phone and it was dark, the lighting was pathetic, and it was on an off red color!
Doesn't the Love sign at the bottom just make it look so cute?! I think so! I just hope Julie likes it. It took me all my Thanksgiving break to get done! I bet you're wondering what we did with the pink and zebra striped material, well we worked on making it a rice pack! I don't know about you but I love having one of those at my finger tips so that if some time during the month I am in pain I can use it, or after a good workout I need to put ice or heat on my sore muscles or joints I have something I can throw in the microwave and heat up or pull out of the freezer. As of lately I have been using a heating pad or rice pack to heat my bed up...I have been freezing at night...and it isn't even snowy outside. But it helps so much! Here is a picture of the S, the rice pack, and another gift I had made previously to the others that I added. I am sort of a sucker for Patriotism and I had made a cute wreath out of balloons, pins, and a straw wreath! I added some burlap for a strap to hang it with and those that came to my house loved it...some even wanted to take it home! But I had to tell them no!
Again, sorry about the sad quality of the picture! But you get the jist! It was fun and I am glad I could do it! I am thinking of doing the one in the summer! I might even have more time to come up with some other things to do! Yea! Here is another picture of the wreath! It's not the best picture, but you can see more of the details!
I hope you have enjoyed reading my blog! I seriously had some major fun doing this Gift Exchange. It was a great way to releave some stress and get my creative juices flowing! I would love some comments on what you think and if you have suggestions on the crafts...things I could have done differently or whatever, or if you have ideas on other crafts I can do I would love it! I love comments, please leave some! Merry Christmas!

Saturday, November 10, 2012

What We've Been Blessed With!

Ever since I arrived at school yesterday and through to today we have been blessed with an abundance of.....SNOW! I have been looking forward to this for a long time! Our winter here in Utah last year was not what I would call "Successful". We had very little snow and rain during winter, let alone in spring! Our Spring was drab. We didn't get much water, which for Utah is very much needed due to this state being a desert. With those two things not working out in our favor our summer was HORRIBLE to say the least. We had multiple fires, many of which took out peoples homes and there were some fatalities. Summer was not fun! But many of the fires that were started were not caused by Mother Nature...it was Human caused. I'm not going to get into that garbage, it annoys me! Anyway, so the glorious gift we have gotten has brightened me up and make me all sorts of excited for Thanksgiving! To me Thanksgiving just isn't Thanksgiving unless you have snow! For those who might read this and don't get snow for Thanksgiving I am trully sorry! I LOVE IT...well, except for driving in it and walking on the ice! I just thoroughly love how it makes things quiet and peaceful, and everything is covered in white. The air gets cleaned too! So I have to remind my students NOT to pick up the snow and eat it due to the germs and nasty stuff in it! And of course we have to talk about the yellow snow and making snow balls. But the one thing they love to do is make snow angels! It is so funny to watch how excited they get! So without further adeu, here are some photos of what I saw when I woke this morning...at 10am! No mocking!
This is the view from the kitchen window. That is why it isn't the best photo! But you can see how snowy it is! While I was shooting that photo I was thinking about going out and doing a snow angel...but I wasn't dressed for it!
This is another picture of the backyard! Isn't it so cool? I love how much snow we got! And it is still falling, which is why I now have my gloves on. My hands are freezing as I type in my cold basement! Brrrrrr!
This is again another shot of the backyard. In the corner there we use to have a HUGE pine tree. It was seriously MASSIVE! This past summer we had it cut down because it was getting side heavy due to the stupid power company cutting the branches on one side and leaving the other side with all the branches...UMMMM, dumb! With strong enough winds that things would have fallen on my house or our neighbors to the south. That would not have been cool. So we had an adventure getting it cut down. Don't worry, no one was hurt in the removal, not even the stupid magpies! Now we have an open area for the raspberries to take over. It is pre-mo dirt with all the wood chips and fertilizer! I bet I could grow a date in there...hmmmmm!
This is our deck (it's pathetic! We need to get it fixed). Look how much snow we have! And our clothes line (some say that's old fashioned...but our clothes and sheets smell so good when we dry them outside and it saves on bills) have quite a bit sitting on them! Yea!
This is our front step. The pumpkins are under our eves and still got snowed on. The pedistal has a random frog statue my nieces love. They are goign to miss it until the snow melts! The next few pictures are of the frontal area of my house. I haven't had a chance to shoot pictures of snow in a while and blog about it. I have missed it. I hope you enjoy them!
Yes those are Halloween lights! I'm not in the mood to take them down. They give off a nice warm orange glow at night, perfect for Thanksgiving!
That is A LOT of snow! Soooo cool! I want to give a special shout out to my my nieghbors the Dugdale's and Thompson's for snow blowing our sidewalks in the front! You guys are very great neighbors! And a bigger shout out to my Mom, Celeste, and Lisa. Thank you for SHOVELING the driveway and cleaning off the cars (while I was asleep in my nice warm bed)! You guys are so very special to me and I love you with all my young girl heart! Have a great weekend! Stay safe and warm! I love comments, hope to hear from ya!

Saturday, October 8, 2011

My Crack

Here are some pictures of my crack...


Just kidding! Here are the real pictures of my crack!

This is a close up of it! You can see the bullseye and all the cracks coming out of it. YIKES!


Here is a closer view of the hole and crack...I mean bullseye! HAHAHAHA, it just sounds so funny! Anyway, here is the rock that I found close to hole. If you look closely enough you can see some of the rock still stuck in the hole/bullseye..

So here is the debriefing...hahaha...I can keep going if you want me to!
Okay, so I was driving home on I-215 on Thursday night after my 12.5 hour day. We had a parent night for all the Kindergarten students at my school...which is what I teach!
Well if you know that highway then you will know where I am talking about. Just before the I-15 overpass I got a rock slamming into my car. You see, they are re-surfacing the road and of course not taking much care to remove the gravel/rocks. Well the rock that is in the picture was kicked up by the car flying down the road in front of me and it hit my windshield like a missle. It was loud and scarry! I even ducked in my car...um, that is embarrassing! Teehee!
When I got home I checked to see what happened and I found that huge hole...with the crack and the rock sitting in the groove between the windshield and the hood of my car. UGH! I was not a happy camper or teacher. I also noticed a bunch of knicks in my paint on the hood and front bumper of my car. All brought to me in part of UDOT and their rocks. HUMPH!

So if you travel on that road, don't drive to closely to the car in front of you and don't drive in the lanes that are grated. I think that is why the crack is so big...all the stinking pot holes and vibrations from the grating. I can't wait for it to be over! OHHHHHH, and drive slower. It will save your car in the long run!

But hey, the good news is...I have a new windshield. Who wants to be that I'll have a rock chip or another crack in it this week?! I bet I will. :(

And to quote my favorite show:
"Good night and BIG BALLS!"
~Sara~

Monday, August 1, 2011

YAY, Fun New Things To Play With

Check out the fun new things I bought today! They were on sale and then I got $5 off one thing and 10% off the other. It was like uphoria! AAAAHHHHH!

I got this lovely thing so I can make lactose free ice cream and sorbet. I was so excited I couldn't wait to get it out and use it!
Pulling it out....


Let's take a look inside--->

Upon opening this and reading the instructions I found I had to freeze the inner bowl for 16-24 hours. ARE YOU KIDDING ME? I wanted to use it ASAP! But noooooo, I have to wait a day before I can. That is just irratating. But it better work really well if I have to wait this long to use it! I'm going to make a recipe I found from Two Peas and Their Pod

The other fun thing I got is...
I saw this and told my mom and sister that it would be so fun to use and experiment with! Since it was on sale and I had the 10% off coupon I decided to get it. It's not like I could really afford it, but I thought it would make my cake pop making easier!
Here is what it looks like out of the package!

And the inside-->
Doesn't that look cool? I wonder if I could make little eggs with this?! Just kidding! I know of a great bacon and egg cup recipe that would be so fun to do with this. OHHHHH, I'm so excited!


Since I couldn't use the ice cream maker right away and I felt like making something I decided to use this. I got out my trusty milk free brownie mix and made it. I plugged in the cord and got to work!
Aren't they cute? I can also make doughnut holes!

The final product are little brownie bites that you can pop in your mouth and devour the scrumptious fudgy-ness within! And I don't cook mine all the way so I get that squishy gooey goodness inside. I don't like the dry stuff! Thanks though!:)

I'll keep ya posted on some of the fun stuff I make using my new toys! And if you're lucky, you'll get to try some! If not, try making some yourself! Let me know what you do, I love hearing from all you guys!

I Love comments, lay 'em on me!

Monday, July 25, 2011

Utah's Birthday and Something YuMmY!

Well today is Monday and though it is not the 24th of July we still celebrated Utah's "Birthday" today with an AWESOME parade put on by none other than......Utahn's! There were some pretty amazing men in kilts, horses with riders, President Monson was in it, incredible floats, men in kilts, clowns, bands, men in kilts, city royalty, and adorable kids! There were smiles everywhere! And I'm sure horse poop too!;)

But something I love and is Utah made that totally seals the day with joy is this:
I know you can't really see what it says but it says "Utah Truffles".
If you could only see, I am totally drooling!
These are a package of love just waiting to be opened! Let's do it:)
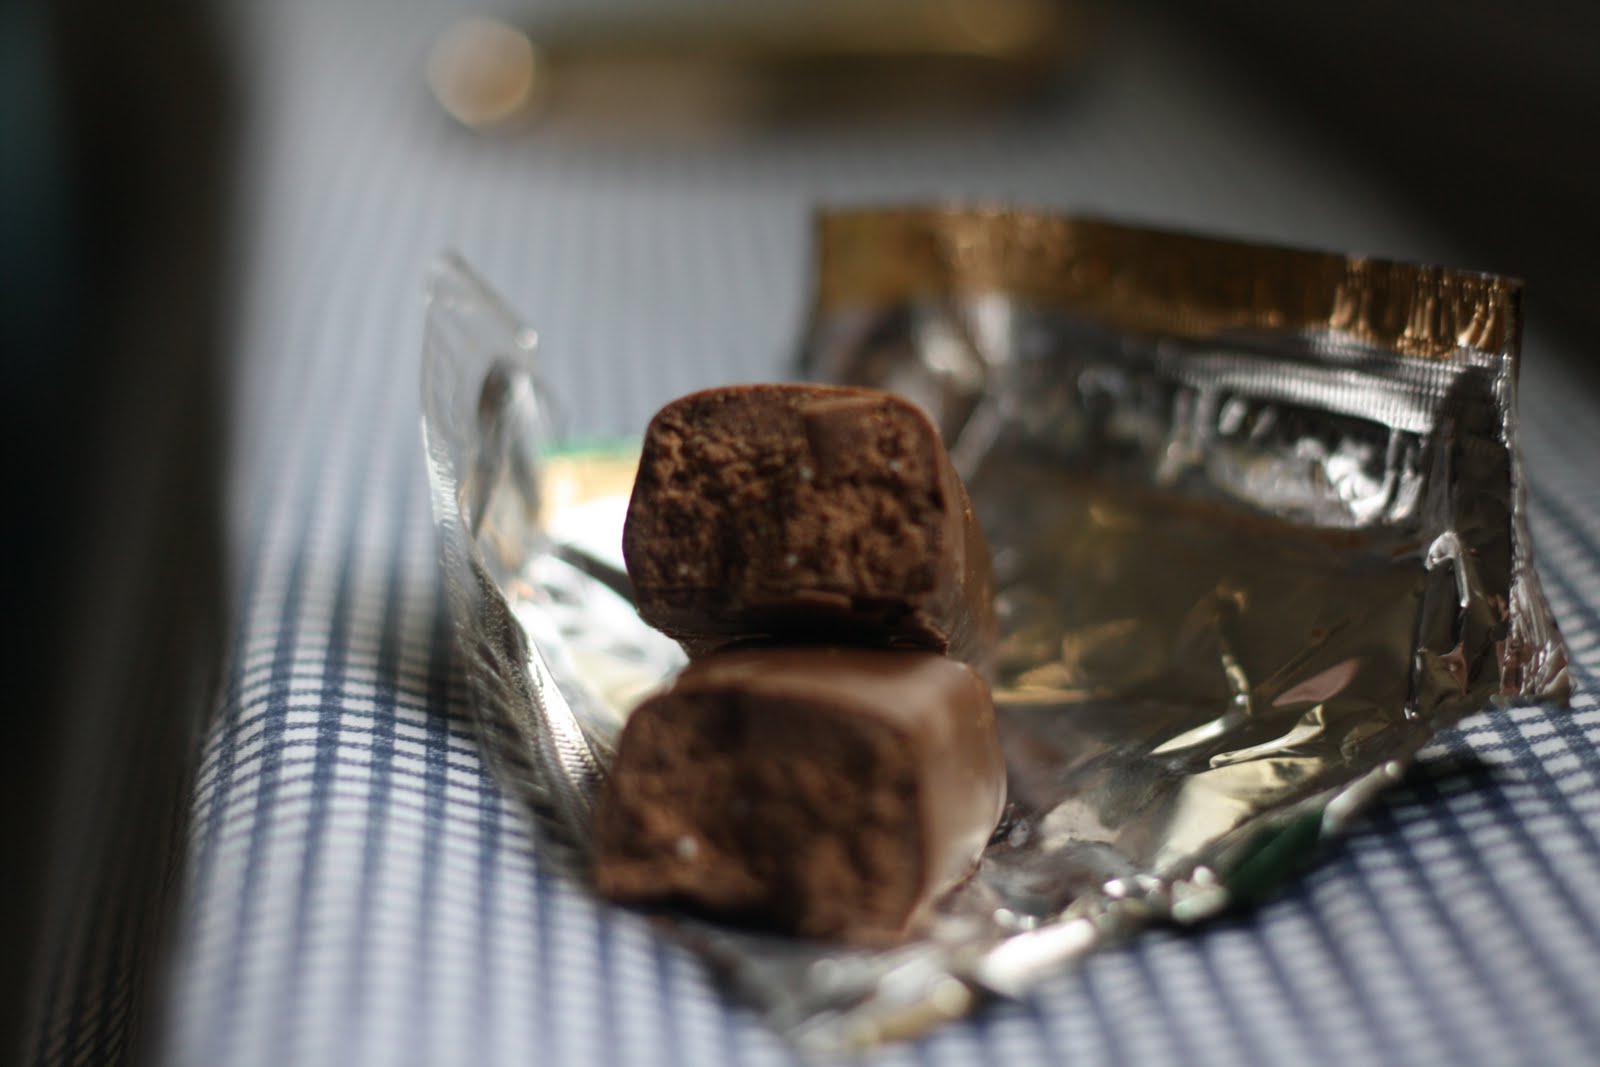
OHHH La La! Now if you have ever had a truffle you know the outside chocolate is "hard" and the inside...well let's just say it melts in your mouth and is better than kissing! Well that is my personal opinion! I have never been kissed so I don't really know but from watching people kiss I think this soft, smooth, richness has got to be better! And to boot, it is mint! Oh glory my mouth is seriously wet!

I can't stand it any longer I have to open it and let you see the delictable middle. Are you ready for this...I hope the picture is okay. The lighting was horrible (I should never shoot out an eastern window at almost dusk).
Here weeeeeeeeee go...
Can you see the love in there?! Just think of how it melts in your mouth...and if you hold onto it to long it will melt in your hand but your hand can't taste it so you better get'er in your mouth before it melts all over the place!

So now that I have just drooled all over my computer and table I had better go eat that bad boy! It is so calling my name!
If you are wondering where to find these yummy treats (I only allow myself one a week or one every two weeks because they are so big...and taste better than the balls you see at check out stands at the grocery store), well I have seen them at Macey's (the grocery store) and Seagul Book and Tape. So go get yourself some! They come in differnt flavors, dark chocolate, dark chocolate and mint, milk chocolate, milk chocolate and mint, milk chocolate with toffee, milk chocolate and raspberry, and milk chocolate and orange. They all taste amazing, so go try one, or two, or all of them!

So celebrate the rest of July and Utah's birthday by giving yourself a special treat...and if you have to hide in the bathroom and take a bubble bath with candles and relaxing music while eating it I totally give you permission!

Let me know what you think!
I love comments so please share:)

Wednesday, June 15, 2011

Birthday Presents and Pure Excitement!

Okay I know I haven't blogged for awhile, that is because I felt no one was even reading my blog. I would check on here to respond to comments and I would only see one faithful person say something. It was rather dejecting to me! So I didn't do any posts and became lost in things to do with my family and my Kindergarten class. Now that school is out I have decided to try this again! Well, with the hope that more people will comment to let me know what y'all think!;)

Now let me show you something I am WAY EXCITED about! I was shopping for one of my really good friends (she is like a sister) birthday present. I had part of it at home; Jolly Rancher chapstick! I was way excited to find it in the dollar section of my ever growing favorite store...Target!

Now for the best part of the gift! Are you ready? I even took pictures! I'm impressed with myself! I just haven't found time to stamp my name on them. So here we go!
The first gift for Leah is:
I saw this and about died! Leah use to work at DQ back in the old college days and we would go and get Blizzards on those HOT..and sometimes cold Cedar days! They have some great flavors! But to be honest, they just aren't the same up here in SL!

And...
Okay so threr are little packets with the mix to make your own personal Blizzard! How cool is that? It is like the Easy Bake Oven...only you make your own fun Blizzards! It came with 2 packets in the original box, but I thought she could use more so that when I go and visit she can make me one! She is pro at getting the top of the ice cream to do the little flip thing on top! I love it! I seriously can't wait to have her make me one...oh the yummy, creamy, ice cold, delicious-ness sliding down my throat and into my tummy! OHHHHHH...I can't find any words to describe how tantalizing it sounds. I want one now!!!!

I of course found a very appropriate card! Leah and I are always trying to one up each other on the hilarious cards for any occasion! I love this one! She is turning the same age I already am! So this totally describes us!

Here is the inside.
Hilarious right?! I love it!


So I am totally psyched about giving this to Leah this weekend!
What are some fun gifts you have given your friends, spouse, parents, siblings, etc lately that are fun and get you excited about giving them? Leave a post so we can all get inspired!

Sunday, April 10, 2011

ARGGGGGG, sorry!

Okay so the post just below this one I tried to do on Microsoft Word. I worked so hard to make it...and it is trully cute with the fun pictures and everything. Then when I went to post it, it said it wasn't able to post the pictures. I am so annoyed. I don't like the fonts on here and the ones I have on Word are much more fun to read.
I am sorry for the inconvience if you read it and want to see the pictures. If you want to see them let me know, I will e-mail them to you. Until then I will work on re-creating it so you can see each step in the Dino-Easter Eggs post.

If you know how to make it work I would love to learn how! Thanks!
Sara

Easter Eggs or Dinosaur Eggs…Who Knows?!

So with Easter comingand the other best part of the seasonSpring Break! I thought I would share with y'all something I found online. I was doing my daily check of Our Best Bites and came upon Sara's (I love that name) latest fun project she was doing with her kidlets. I saw it and I got so overly excited I about did an Irish Jigsorry for the visual! It was about 6:30 in the morning on a Friday and I was so tiredthis was a great way to wake me up!

Lately I have been feeling really low because of all the stuff I am dealing with. Since finding this website I have perked up a bit and gotten excited! It feels so great to have something to take my mind off work and stuff!


1st boil some eggs! I used some that our neighbor gave usfresh from the farm! It doesn't matter what kind you use!


2nd, after the eggs have cooled you are going to crack it. Simply tap it on the counter so you have cracks all over the eggs, like mine! I didn't know I could be my own model! *It is okay if some small pieces fall off, just make sure none of the big ones do.


3rd, get some mugs or glass cups. We had these mugs laying around and eggs fit in them so I just grabbed them! Add some food coloring to the mugs and some water. I used a lot as you will see in the next picture, I wanted the eggs to be really vibrant!


4th, use as much or as little food coloring as you wish! Add water and stir to make sure it is mixed together well.


5th, carefully plop/put the eggs in the mug with the water and food coloring mixture. The eggs will need to "hang-out" in the food color & water for a while. I left mine in over night, I actually don't know how long they are supposed to be in it! I guess if you do it in the morning you could just leave it soaking all day?!

    *One note, so your egg doesn't go bad and stuff, I highly suggest putting your eggs in the fridge! No one needs salmanila poisoning!


6th, after they have sat in the mug/cup, carefully take them out. I put mine in a bowl with paper towels so they wouldn't bleed on each other! Don't they look purdy?!


7th, I left this as a big picture so you can see the deatails of the food coloring on the eggs. Isn't it cool? My favorite is the purple one. It is so bright and vibrant! It looks like artistic spider websI guess they could be called egg webs! Ha ha ha!


This is another view of them without the shell still attached! The blue one in this picture looks rad too! Sometimes there are spots where the food coloring didn't get. It's okay, they still look unique and festive! Don't worry, they taste good too! I promise!


Here's the last thing I am going to show you before you jump off your chair and go try this! Aren't the insides of the shell awesome?! It's like the design rubbed off or something! My mom thought it was pretty "tight"!

    Now ENJOY! I am sure the kids will have fun making these! If you let them take part in it, it is even more exciting! I can't wait to hear from ya on how it goes!

    Well there you have it! Dino-Easter Eggs! I didn't think I could make anything so fun late at night, but I did! Hip-hip hooray for me! I hope you have as much fun making them as I did! Oh and by the way, they DID taste yummy! With a little salthard boiled Dino-Easter Eggs are delish!

Hoppy Easter!

sGSara

P.S. I love comments! I hope you'll leave some!


Sunday, February 13, 2011

Gooey Goodness!

Some people call these Chess Squares, others have a different name. I'm not sure what to call them but I tried making them after I found the post about them on KevinandAmanda.com. Here's look and probably taste better than these.
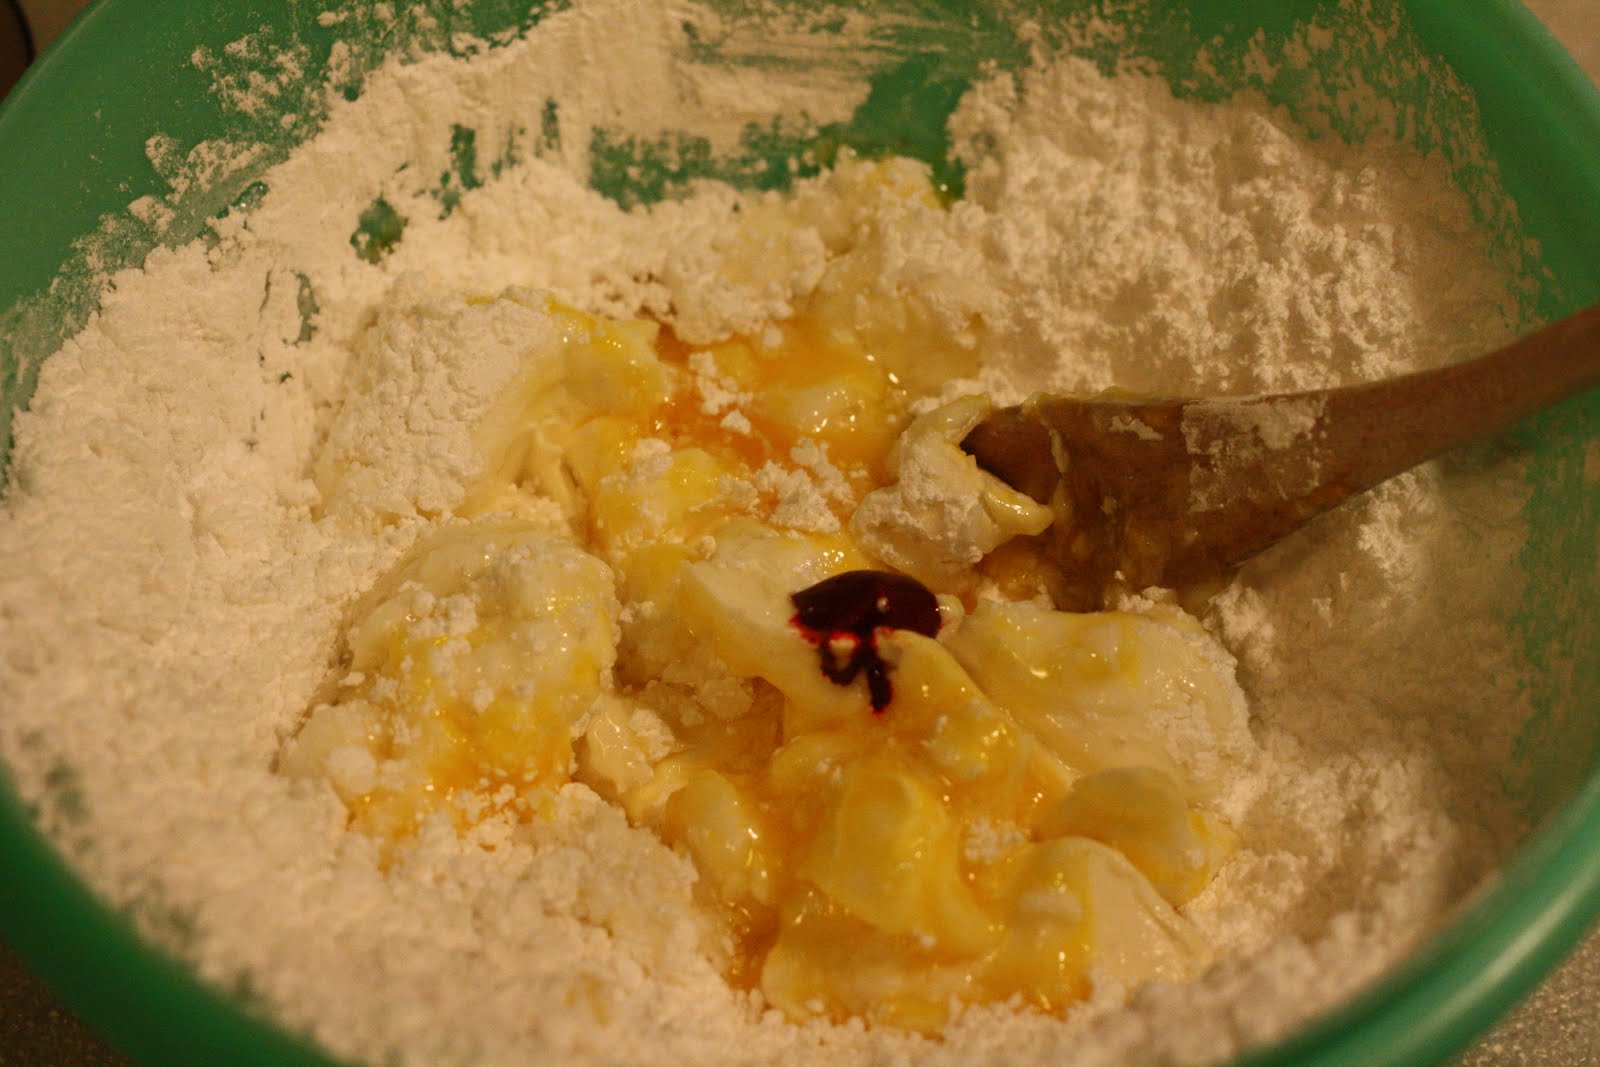
It says to use a yellow cake mix, I didn't use that! I used a chocholate cake mix and tried to make it my favorite color...RED! Well, it didn't work! BLAST!

If you want to try them they are pretty easy to do and I bet yours will be better than mine! I will be making them again so that I can have them for Valentine's...or Single Awareness Day!


Here is what you'll need. As you can see if you checked out the link to Amanda's site she used a yellow cake mix. I wanted to try chocolate. Not sure if I like it though!


Mix the cake mix, one egg, and melted butter together.


Now that you have the dough, press it into the bottom of the 9X13 inch pan. Mine is swirly, because I added the red food coloring after I had it mixed...it is kind of cool, aye?!


Now it's time to make the topping! Mix the powder sugar, 2 eggs, and cream cheese (softened). I don't have a Kitchen Aid....and you have no idea how BADLY I want one...seriously you don't! It is a HUGE dream of mine to have one...I'm a dork!
I forgot to read this next part....but make sure you mix it with either a hand mixer you the great Kitchen Aid for about 3 minutes. I think that will make a HUGE difference in the topping. That might be why mine didn't work as it should have!


Pour and spread it evenly over the dough. Mmmmmmmm, it looks so yummy! I mean HeLLo! It has cream cheese in it! YUMMY!


Put it in the oven at 300 degrees for 40-50 minutes. When you take it out it should be golden brown on top. Or golden red if you do it like mine.
Now here is where it got tricky for me. When I tested it with a fork, the topping/cream cheese mixture was still gooey and I wasn't sure if that is what it should be like. I put it in for a little while longer. If you know anything about it please let me know if it should be runny/gooey or fimly baked and a fork when inserted come out clean!?!


The kitchen in which I am cooking/baking is painted YELLOW. Not the best background for pictures. It changes the colors of things and adds a weird hue to things. Sorry, it does effect things that way! So they don't look the best...but oh do they taste pretty good! I would suggest waiting until they have cooled down before eating...I burnt my tongue and I couldn't properly taste it after that! Whoops!

Enjoy and I hope you try them and that they taste great! I will be doing them again...this time I will do them differently! I think I'll do them with a yellow cake mix this time;)

Happy Baking and Happy Valentine's Day!

Here's the recipe:

Chess Squares

1 box yellow cake mix
3 eggs
8 oz cream cheese, softened
1/2 cup (1 stick) butter, melted
4 cups (1 lb) powdered sugar

Preheat oven to 300 and spray a 9×13 dish with cooking spray. Mix cake mix, melted butter and one egg to a soft dough. Press into the bottom of the pan. Mix powdered sugar, softened cream cheese and remaining two eggs until smooth, about 1-2 mins. Pour on top of crust. Bake at 300 for 40-50 minutes until top is golden brown.


I love comments...please leave some!

Monday, February 7, 2011

HELP!

Okay I have been doing some deep personal searching. As my world is tossed upside down I feel the need to re-connect with myself. I have been giving so much of myself to others, it's time for me to get back some of me for me! I have tried and then found that I'm needed more in other places so I go and do! Am I being selfish?

Well one thing I need to do is figure out what things I can eat! I am VERY lactose intollerant and there are so many yummmmmmmmmmmmmy things I want to make but I can't because of what it does to me. So I am here asking, begging, pleading for some help! Do you or your friends or family know of some blogs for...I guess vegan recipes or for lactose free stuff! I am not vegan....I LOVE chicke and turkey and steaks! But the blasted white stuff that comes from utters does not agree with me at all and I am true lover of milk!

HEEEEEEEEEELP!!

OH and by the way, I might soon be bearing news of some great importance! wooohoooo!

Wednesday, December 29, 2010

Gingerbread House...or Whatever!

Okay, so for FHE (a few weeks ago) they had a big Christmas dinner. But while we waited they had us all make different kinds of Gingerbread houses. It was soooooo much fun! The different kinds of houses were things like; a Swiss Chateau, an Igloo, Teepees, a church, a stable, a windmill, a train station, a bird house, etc. The bestest of them all is the one I got to make with my friends. I was the one that did the actual construction (I knew I should have gone into contruction) and they handed me the materials and helped with the planning of it!
While we were making it we had so many people walk by and start laughing and say it was the best gingerbread house in the whole room! They also said it looked so life like...if only they were little enough to use it!
Have any idea what it is? If you haven't guessed what it is yet maybe this will help!


Isn't great? I think I should be a professional Out House Builder! AHAHAHAH!

Here are some other shots I took of it...for your enjoyment. Pay attention to the great deails! The ptiched roof, toilet...including a seat(mind you it's down and not up!), the toilet paper roll with a holder, the moon on the door, the door handle, and the air pipe on the back. I know it looks like it was made with actual poop, but it's just icing...don't worry! Prett ironic that they gave us icing that color for that Gingerbread House! Teeheeeee!


I think each Christmas I want to make a different kind of Gingerbread House. Who wants to do it with me? We could do a little Gingerbread Club! I think it would be fun to get together and just create some fun stuff! Who's in?!

Happy Holidays!