Okay so the post just below this one I tried to do on Microsoft Word. I worked so hard to make it...and it is trully cute with the fun pictures and everything. Then when I went to post it, it said it wasn't able to post the pictures. I am so annoyed. I don't like the fonts on here and the ones I have on Word are much more fun to read.
I am sorry for the inconvience if you read it and want to see the pictures. If you want to see them let me know, I will e-mail them to you. Until then I will work on re-creating it so you can see each step in the Dino-Easter Eggs post.
If you know how to make it work I would love to learn how! Thanks!
Sara
Sunday, April 10, 2011
Easter Eggs or Dinosaur Eggs…Who Knows?!
So with Easter coming…and the other best part of the season…Spring Break! I thought I would share with y'all something I found online. I was doing my daily check of Our Best Bites and came upon Sara's (I love that name) latest fun project she was doing with her kidlets. I saw it and I got so overly excited I about did an Irish Jig…sorry for the visual! It was about 6:30 in the morning on a Friday and I was so tired…this was a great way to wake me up!
Lately I have been feeling really low because of all the stuff I am dealing with. Since finding this website I have perked up a bit and gotten excited! It feels so great to have something to take my mind off work and stuff!
1st boil some eggs! I used some that our neighbor gave us…fresh from the farm! It doesn't matter what kind you use!
2nd, after the eggs have cooled you are going to crack it. Simply tap it on the counter so you have cracks all over the eggs, like mine! I didn't know I could be my own model! *It is okay if some small pieces fall off, just make sure none of the big ones do.
3rd, get some mugs or glass cups. We had these mugs laying around and eggs fit in them so I just grabbed them! Add some food coloring to the mugs and some water. I used a lot as you will see in the next picture, I wanted the eggs to be really vibrant!
4th, use as much or as little food coloring as you wish! Add water and stir to make sure it is mixed together well.
5th, carefully plop/put the eggs in the mug with the water and food coloring mixture. The eggs will need to "hang-out" in the food color & water for a while. I left mine in over night, I actually don't know how long they are supposed to be in it! I guess if you do it in the morning you could just leave it soaking all day?!
*One note, so your egg doesn't go bad and stuff, I highly suggest putting your eggs in the fridge! No one needs salmanila poisoning!
6th, after they have sat in the mug/cup, carefully take them out. I put mine in a bowl with paper towels so they wouldn't bleed on each other! Don't they look purdy?!
7th, I left this as a big picture so you can see the deatails of the food coloring on the eggs. Isn't it cool? My favorite is the purple one. It is so bright and vibrant! It looks like artistic spider webs…I guess they could be called egg webs! Ha ha ha!
This is another view of them without the shell still attached! The blue one in this picture looks rad too! Sometimes there are spots where the food coloring didn't get. It's okay, they still look unique and festive! Don't worry, they taste good too! I promise!
Here's the last thing I am going to show you before you jump off your chair and go try this! Aren't the insides of the shell awesome?! It's like the design rubbed off or something! My mom thought it was pretty "tight"!
Now ENJOY! I am sure the kids will have fun making these! If you let them take part in it, it is even more exciting! I can't wait to hear from ya on how it goes!
Well there you have it! Dino-Easter Eggs! I didn't think I could make anything so fun late at night, but I did! Hip-hip hooray for me! I hope you have as much fun making them as I did! Oh and by the way, they DID taste yummy! With a little salt…hard boiled Dino-Easter Eggs are delish!
Hoppy Easter!
sGSara
P.S. I love comments! I hope you'll leave some!
Sunday, February 13, 2011
Gooey Goodness!
Some people call these Chess Squares, others have a different name. I'm not sure what to call them but I tried making them after I found the post about them on KevinandAmanda.com. Here's look and probably taste better than these.
It says to use a yellow cake mix, I didn't use that! I used a chocholate cake mix and tried to make it my favorite color...RED! Well, it didn't work! BLAST!
If you want to try them they are pretty easy to do and I bet yours will be better than mine! I will be making them again so that I can have them for Valentine's...or Single Awareness Day!

Here is what you'll need. As you can see if you checked out the link to Amanda's site she used a yellow cake mix. I wanted to try chocolate. Not sure if I like it though!

Mix the cake mix, one egg, and melted butter together.

Now that you have the dough, press it into the bottom of the 9X13 inch pan. Mine is swirly, because I added the red food coloring after I had it mixed...it is kind of cool, aye?!

Now it's time to make the topping! Mix the powder sugar, 2 eggs, and cream cheese (softened). I don't have a Kitchen Aid....and you have no idea how BADLY I want one...seriously you don't! It is a HUGE dream of mine to have one...I'm a dork!
I forgot to read this next part....but make sure you mix it with either a hand mixer you the great Kitchen Aid for about 3 minutes. I think that will make a HUGE difference in the topping. That might be why mine didn't work as it should have!

Pour and spread it evenly over the dough. Mmmmmmmm, it looks so yummy! I mean HeLLo! It has cream cheese in it! YUMMY!

Put it in the oven at 300 degrees for 40-50 minutes. When you take it out it should be golden brown on top. Or golden red if you do it like mine.
Now here is where it got tricky for me. When I tested it with a fork, the topping/cream cheese mixture was still gooey and I wasn't sure if that is what it should be like. I put it in for a little while longer. If you know anything about it please let me know if it should be runny/gooey or fimly baked and a fork when inserted come out clean!?!

The kitchen in which I am cooking/baking is painted YELLOW. Not the best background for pictures. It changes the colors of things and adds a weird hue to things. Sorry, it does effect things that way! So they don't look the best...but oh do they taste pretty good! I would suggest waiting until they have cooled down before eating...I burnt my tongue and I couldn't properly taste it after that! Whoops!
Enjoy and I hope you try them and that they taste great! I will be doing them again...this time I will do them differently! I think I'll do them with a yellow cake mix this time;)
Happy Baking and Happy Valentine's Day!
Here's the recipe:
Chess Squares
1 box yellow cake mix
3 eggs
8 oz cream cheese, softened
1/2 cup (1 stick) butter, melted
4 cups (1 lb) powdered sugar
Preheat oven to 300 and spray a 9×13 dish with cooking spray. Mix cake mix, melted butter and one egg to a soft dough. Press into the bottom of the pan. Mix powdered sugar, softened cream cheese and remaining two eggs until smooth, about 1-2 mins. Pour on top of crust. Bake at 300 for 40-50 minutes until top is golden brown.
I love comments...please leave some!
It says to use a yellow cake mix, I didn't use that! I used a chocholate cake mix and tried to make it my favorite color...RED! Well, it didn't work! BLAST!
If you want to try them they are pretty easy to do and I bet yours will be better than mine! I will be making them again so that I can have them for Valentine's...or Single Awareness Day!

Here is what you'll need. As you can see if you checked out the link to Amanda's site she used a yellow cake mix. I wanted to try chocolate. Not sure if I like it though!

Mix the cake mix, one egg, and melted butter together.

Now that you have the dough, press it into the bottom of the 9X13 inch pan. Mine is swirly, because I added the red food coloring after I had it mixed...it is kind of cool, aye?!
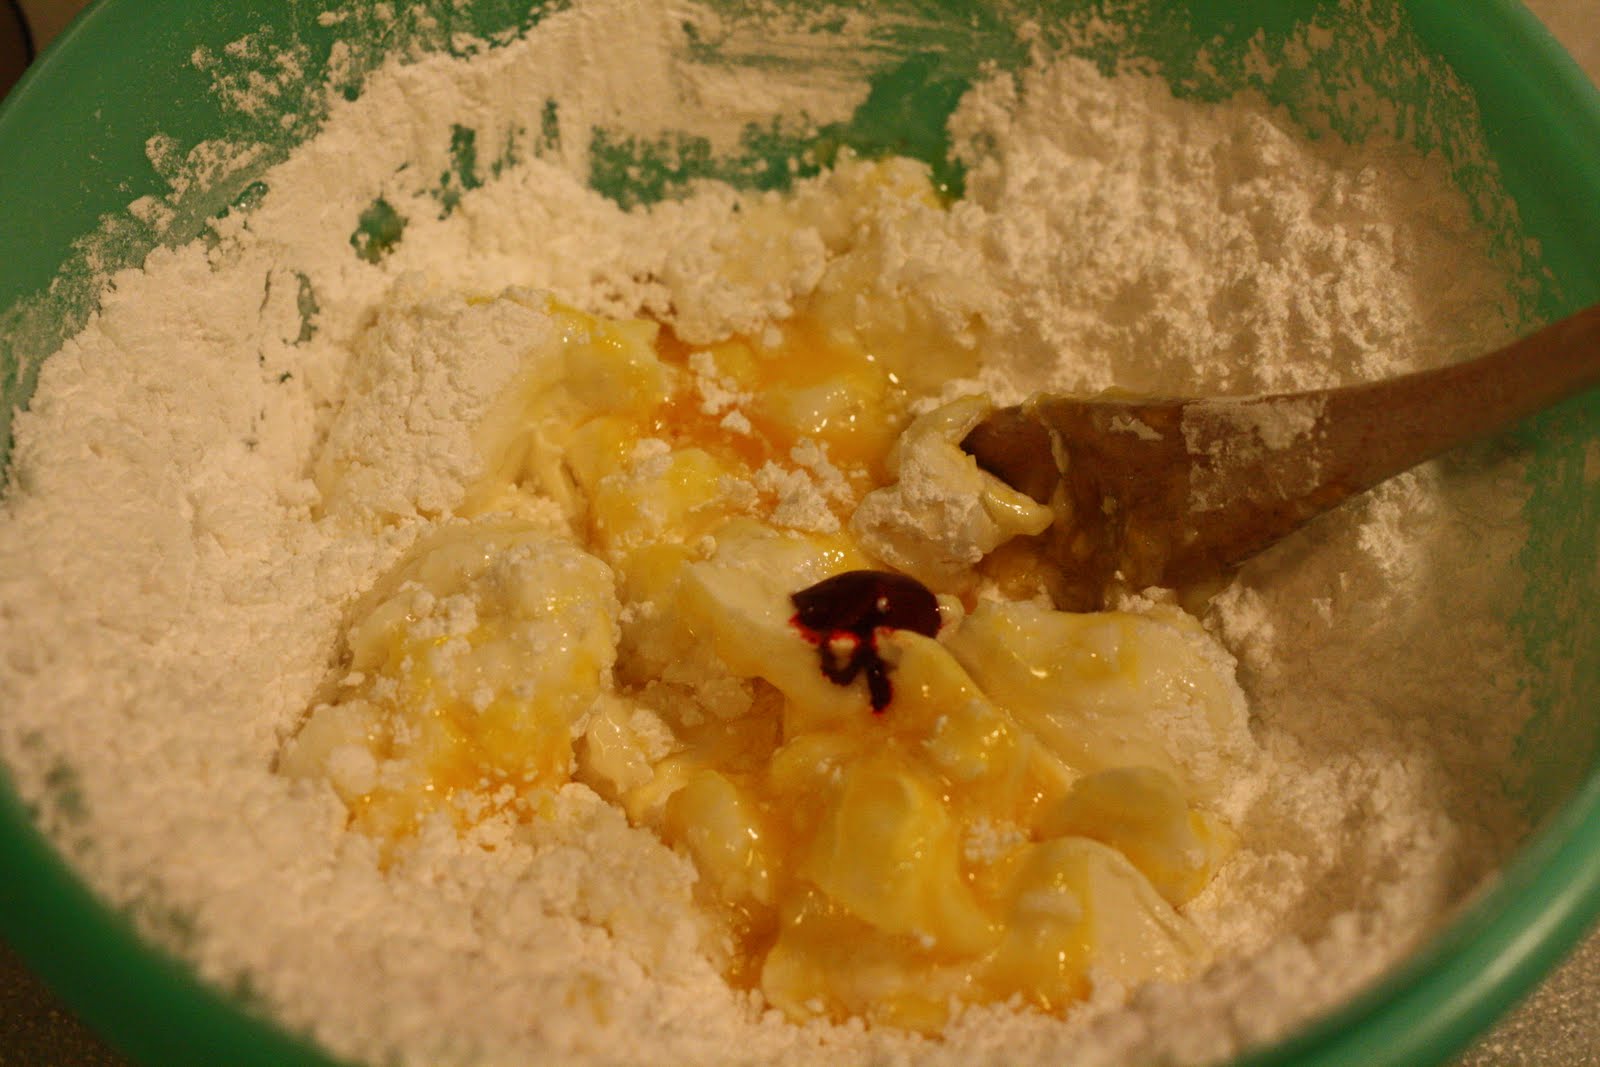
Now it's time to make the topping! Mix the powder sugar, 2 eggs, and cream cheese (softened). I don't have a Kitchen Aid....and you have no idea how BADLY I want one...seriously you don't! It is a HUGE dream of mine to have one...I'm a dork!
I forgot to read this next part....but make sure you mix it with either a hand mixer you the great Kitchen Aid for about 3 minutes. I think that will make a HUGE difference in the topping. That might be why mine didn't work as it should have!

Pour and spread it evenly over the dough. Mmmmmmmm, it looks so yummy! I mean HeLLo! It has cream cheese in it! YUMMY!

Put it in the oven at 300 degrees for 40-50 minutes. When you take it out it should be golden brown on top. Or golden red if you do it like mine.
Now here is where it got tricky for me. When I tested it with a fork, the topping/cream cheese mixture was still gooey and I wasn't sure if that is what it should be like. I put it in for a little while longer. If you know anything about it please let me know if it should be runny/gooey or fimly baked and a fork when inserted come out clean!?!

The kitchen in which I am cooking/baking is painted YELLOW. Not the best background for pictures. It changes the colors of things and adds a weird hue to things. Sorry, it does effect things that way! So they don't look the best...but oh do they taste pretty good! I would suggest waiting until they have cooled down before eating...I burnt my tongue and I couldn't properly taste it after that! Whoops!
Enjoy and I hope you try them and that they taste great! I will be doing them again...this time I will do them differently! I think I'll do them with a yellow cake mix this time;)
Happy Baking and Happy Valentine's Day!
Here's the recipe:
Chess Squares
1 box yellow cake mix
3 eggs
8 oz cream cheese, softened
1/2 cup (1 stick) butter, melted
4 cups (1 lb) powdered sugar
Preheat oven to 300 and spray a 9×13 dish with cooking spray. Mix cake mix, melted butter and one egg to a soft dough. Press into the bottom of the pan. Mix powdered sugar, softened cream cheese and remaining two eggs until smooth, about 1-2 mins. Pour on top of crust. Bake at 300 for 40-50 minutes until top is golden brown.
I love comments...please leave some!
Monday, February 7, 2011
HELP!
Okay I have been doing some deep personal searching. As my world is tossed upside down I feel the need to re-connect with myself. I have been giving so much of myself to others, it's time for me to get back some of me for me! I have tried and then found that I'm needed more in other places so I go and do! Am I being selfish?
Well one thing I need to do is figure out what things I can eat! I am VERY lactose intollerant and there are so many yummmmmmmmmmmmmy things I want to make but I can't because of what it does to me. So I am here asking, begging, pleading for some help! Do you or your friends or family know of some blogs for...I guess vegan recipes or for lactose free stuff! I am not vegan....I LOVE chicke and turkey and steaks! But the blasted white stuff that comes from utters does not agree with me at all and I am true lover of milk!
HEEEEEEEEEELP!!
OH and by the way, I might soon be bearing news of some great importance! wooohoooo!
Well one thing I need to do is figure out what things I can eat! I am VERY lactose intollerant and there are so many yummmmmmmmmmmmmy things I want to make but I can't because of what it does to me. So I am here asking, begging, pleading for some help! Do you or your friends or family know of some blogs for...I guess vegan recipes or for lactose free stuff! I am not vegan....I LOVE chicke and turkey and steaks! But the blasted white stuff that comes from utters does not agree with me at all and I am true lover of milk!
HEEEEEEEEEELP!!
OH and by the way, I might soon be bearing news of some great importance! wooohoooo!
Wednesday, December 29, 2010
Gingerbread House...or Whatever!
Okay, so for FHE (a few weeks ago) they had a big Christmas dinner. But while we waited they had us all make different kinds of Gingerbread houses. It was soooooo much fun! The different kinds of houses were things like; a Swiss Chateau, an Igloo, Teepees, a church, a stable, a windmill, a train station, a bird house, etc. The bestest of them all is the one I got to make with my friends. I was the one that did the actual construction (I knew I should have gone into contruction) and they handed me the materials and helped with the planning of it!
While we were making it we had so many people walk by and start laughing and say it was the best gingerbread house in the whole room! They also said it looked so life like...if only they were little enough to use it!
Have any idea what it is? If you haven't guessed what it is yet maybe this will help!

Isn't great? I think I should be a professional Out House Builder! AHAHAHAH!
Here are some other shots I took of it...for your enjoyment. Pay attention to the great deails! The ptiched roof, toilet...including a seat(mind you it's down and not up!), the toilet paper roll with a holder, the moon on the door, the door handle, and the air pipe on the back. I know it looks like it was made with actual poop, but it's just icing...don't worry! Prett ironic that they gave us icing that color for that Gingerbread House! Teeheeeee!


I think each Christmas I want to make a different kind of Gingerbread House. Who wants to do it with me? We could do a little Gingerbread Club! I think it would be fun to get together and just create some fun stuff! Who's in?!
Happy Holidays!
While we were making it we had so many people walk by and start laughing and say it was the best gingerbread house in the whole room! They also said it looked so life like...if only they were little enough to use it!
Have any idea what it is? If you haven't guessed what it is yet maybe this will help!

Isn't great? I think I should be a professional Out House Builder! AHAHAHAH!
Here are some other shots I took of it...for your enjoyment. Pay attention to the great deails! The ptiched roof, toilet...including a seat(mind you it's down and not up!), the toilet paper roll with a holder, the moon on the door, the door handle, and the air pipe on the back. I know it looks like it was made with actual poop, but it's just icing...don't worry! Prett ironic that they gave us icing that color for that Gingerbread House! Teeheeeee!


I think each Christmas I want to make a different kind of Gingerbread House. Who wants to do it with me? We could do a little Gingerbread Club! I think it would be fun to get together and just create some fun stuff! Who's in?!
Happy Holidays!
Christmas Festivities!!!
Things have been so busy around my house that I haven't had much time to sit and blog. I don't really know how many people actually read this but I thought maybe it is time to post some pictures of what I have been up to. Other than stressing out at the beginning of the month and deciding to take back my life instead of letting work rule my life!
I have had so much fun with the whole "Cake Pop" thing that I decided to make some and take some pictures of them. So they are now part of my "Favorite Things To Do"! I love taking photos (though I'm not very good at it) and making cake pops/balls. I like other things but these are up there on the list!
These cake pops were so fun! I actually got my mom involved and it was a BLAST! It not only allowed me to the opportunity "de-stress" but it allowed me to get into my creative element and share some time with my mom! I love that! I now also have found a yummy kind of cake that I really like, RED VELVET! The one I used is by Duncan Hines(?) and the best part is that it DOESN'T HAVE MILK IN IT! Yea for them! They know how to make me happy! The coating on these is dark chocolate MINT! woohoooooo! Now, if you haven't had these you are so missing out! They are amazing and I got all excited about using SPRINKLES! THEY ARE SO CUTE!
Take a look at some of them with the cute background! Now rembmer these were done at night and in a room with my moms favorite color...YELLOW! It doesn't help with the way the photos turn out:)!
If you ever want to get together and do them, let me know, I am all for it! I LOVE making them, I'm not kidding! It is a blast! My hands get really dry from doing it but I love it none the less!

These are actually some Pops from a batch I made for a Christmas thing for work. I loved how the chocolate got all swirly! Don't they look cool with Santa and Mrs. Claus kissing in the background?!

These are 3 of my favorite pops from the batch for work! I love the background, seriously! So cute! I saved these 3 for me because I love the design the candy coating made. Don't they look better than the ones I made for Halloween?! I think so!

Okay so these are the ones that my mom and I did. They were a blast to do together! What a great bonding time it was!
This picture makes me think of the movie "ELF". YOu know when he is describing the places he had to travel through to get to NY? The cand cane forest, the gumdrops, etc. This is the forest of Cake Pops! Not only are they cute, but they taste so YUMMY!

I tried doing double pops for the snowman effect...didn't quite turn out the way I wanted it to but they still look fun...right?! My niece loves them. She even screamed at her mom when she tried to take it away from her so she could feed her dinner (so cute)!

These were the cake balls I made. I don't know what the deal is, but everytime I try to make them they turn out looking like a plops of candy poop! I don't know how to get them to be smooth like the cake pops. If you have any ideas I would love to hear them. I need help. I am helping make some for a bridal shower and I want them to turn out better than this.
OH, the candy coating I used for this is candy cane candy coating. It was so yummy, and with the red velvet cake it was absolutely DELISH! My mouth is watering like crazy right now!
So what did you do for your work parties or neighbors for the holidays? Anything fun you want to share? I would love to hear about it! Leave a comment, I really enjoy hearing your insights!
I have had so much fun with the whole "Cake Pop" thing that I decided to make some and take some pictures of them. So they are now part of my "Favorite Things To Do"! I love taking photos (though I'm not very good at it) and making cake pops/balls. I like other things but these are up there on the list!
These cake pops were so fun! I actually got my mom involved and it was a BLAST! It not only allowed me to the opportunity "de-stress" but it allowed me to get into my creative element and share some time with my mom! I love that! I now also have found a yummy kind of cake that I really like, RED VELVET! The one I used is by Duncan Hines(?) and the best part is that it DOESN'T HAVE MILK IN IT! Yea for them! They know how to make me happy! The coating on these is dark chocolate MINT! woohoooooo! Now, if you haven't had these you are so missing out! They are amazing and I got all excited about using SPRINKLES! THEY ARE SO CUTE!
Take a look at some of them with the cute background! Now rembmer these were done at night and in a room with my moms favorite color...YELLOW! It doesn't help with the way the photos turn out:)!
If you ever want to get together and do them, let me know, I am all for it! I LOVE making them, I'm not kidding! It is a blast! My hands get really dry from doing it but I love it none the less!

These are actually some Pops from a batch I made for a Christmas thing for work. I loved how the chocolate got all swirly! Don't they look cool with Santa and Mrs. Claus kissing in the background?!

These are 3 of my favorite pops from the batch for work! I love the background, seriously! So cute! I saved these 3 for me because I love the design the candy coating made. Don't they look better than the ones I made for Halloween?! I think so!

Okay so these are the ones that my mom and I did. They were a blast to do together! What a great bonding time it was!
This picture makes me think of the movie "ELF". YOu know when he is describing the places he had to travel through to get to NY? The cand cane forest, the gumdrops, etc. This is the forest of Cake Pops! Not only are they cute, but they taste so YUMMY!

I tried doing double pops for the snowman effect...didn't quite turn out the way I wanted it to but they still look fun...right?! My niece loves them. She even screamed at her mom when she tried to take it away from her so she could feed her dinner (so cute)!

These were the cake balls I made. I don't know what the deal is, but everytime I try to make them they turn out looking like a plops of candy poop! I don't know how to get them to be smooth like the cake pops. If you have any ideas I would love to hear them. I need help. I am helping make some for a bridal shower and I want them to turn out better than this.
OH, the candy coating I used for this is candy cane candy coating. It was so yummy, and with the red velvet cake it was absolutely DELISH! My mouth is watering like crazy right now!
So what did you do for your work parties or neighbors for the holidays? Anything fun you want to share? I would love to hear about it! Leave a comment, I really enjoy hearing your insights!
Friday, November 5, 2010
Wow, it has been a while since I have been on here! I don't have any pictures of me! I don't want to make you throw up! But I have found a new and fun project that keeps me going and has me so excited that I have to share!
Now the first batch of this lovely new stuff totally BOMBED! I didn't do it right, I was completely guessing on the amounts for the recipe. NOTTHING worked and like my kids said...the icing smelled like playdough! YUCK! I won't be using that kind again!
For those who read this and work with me, you already know what it is! I made CAKE POPS! They are so fun to make...when you do it the right way, they taste YuMmY, and they look adorable! I found out about them from a website about food blogs! The lady who created them is so adorable, she goes by Bakerella! I can't get enough of these. I am putting the cake mix business in even more business! And my wallet in severe trouble! I just need to work on making them lactose free!
Now, when I made my second batch (the ones that turned out a TON better) they tasted amazing! But, I'm still working on getting them to look cute! So bear with me! Here are some pictures of the end product! I was so proud of myself..but as I get better I will feel more confident!

Sorry about the dirty wall behind the pops. That is what I get for taking pictures in the kitchen and on the stove! Next time it will not be that way...I hope! If not, oh well!
Hey, I would love some more imput on the taste! Any takers!?!
Now the first batch of this lovely new stuff totally BOMBED! I didn't do it right, I was completely guessing on the amounts for the recipe. NOTTHING worked and like my kids said...the icing smelled like playdough! YUCK! I won't be using that kind again!
For those who read this and work with me, you already know what it is! I made CAKE POPS! They are so fun to make...when you do it the right way, they taste YuMmY, and they look adorable! I found out about them from a website about food blogs! The lady who created them is so adorable, she goes by Bakerella! I can't get enough of these. I am putting the cake mix business in even more business! And my wallet in severe trouble! I just need to work on making them lactose free!
Now, when I made my second batch (the ones that turned out a TON better) they tasted amazing! But, I'm still working on getting them to look cute! So bear with me! Here are some pictures of the end product! I was so proud of myself..but as I get better I will feel more confident!

Sorry about the dirty wall behind the pops. That is what I get for taking pictures in the kitchen and on the stove! Next time it will not be that way...I hope! If not, oh well!
Hey, I would love some more imput on the taste! Any takers!?!
Subscribe to:
Posts (Atom)